RV Solar Powered. What we bought to DIY our solar.
Solar power is a pretty hot topic among fulltime RVers, especially those who boondock often.
It is great to think you can harness the power of the sun and never have to worry about having power again. However, this is a bit of a fairytale.
Today, we are going to share with you the ins and outs of having solar power, what products we used, how much it cost us, and how we did it.
The first thing I want everyone to know, because I had no clue when we started looking into solar, is that solar power itself ONLY charges your batteries.
If you have had any experience in a RV, without being hooked up to shore power, you know that battery power only runs the basics like your lights. In our rig it also runs our fridge, which does not have a propane option, and our USB ports.
However, it does NOT run your outlets!
That’s right, you can’t even use your outlets, which means no microwave, tv, Playstations, laptop charging, etc.
So how are we able to run our outlets?
We have an inverter.
As Kenneth often tells me, an inverter is not solar.
Instead, an inverter is what increases the power coming from your batteries to the voltage needed to power your electrical outlets.
But for the sake of this post, and our solar system set up, I will also be discussing the inverter with you.
Kenneth also wants everyone to know that if you are going to invest in solar, go ahead and invest in greater battery storage.
We have not done this yet, and it means we still have to run our generator in the evenings. It is frustrating for us, and we are looking to upgrade our battery bank. We know part of this is because our fridge is all electric. It has no propane option, so it uses up some battery storage. If you do not have an all-electric fridge you may not need as much battery power.
How do you know how much battery bank you need?
First you need a realistic idea of what you are wanting to power with it.
Notice I said be realistic.
Can you power your A/C unit off of solar, with an inverter, absolutely!
However, the battery bank you would need to do so would be extremely heavy. Do you have that kind of weight to spare?
This is the same with any high-draw appliances such as hair dryers, coffee pots, microwaves, etc. Depending on the type you have and how much power it needs, it may not be a realistic option for you. We can power our microwave with our solar if needed, but our coffee pot is a struggle to power. A greater battery bank will give us greater options, but for now we just do not use high-draw appliances.
Once you sit down and really think about what you want to power with your solar, you need to determine the size of battery bank you need. Do not worry, if the battery bank size you come up with is too much, go back to the drawing board and figure out what appliances you can live without.
Figure out how many amphours each item uses.
This site has a great explanation on how to do this, with an easy to follow equation.
Times the number of amphours by the number of hours you want to use that item.
Add up the amount you get for each of your appliances.
For lead acid batteries, double your amp hour total, because they should not be drained past 50% or this decreases their battery life.
For lithium batteries you can safely drain them down until 20%, so doubling would be way more than needed by increasing by at least 20% is necessary, increasing by 1/3 is what we recommend.
*UPDATED NOTE* We started with just the normal battery that came factory installed with out travel trailer. We recently upgraded to include that battery plus two 6-volt golf cart batteries that are run in series. The addition of these 2 batteries almost tripled our amp hours. However, since adding these batteries we have been work camping in Yellowstone National Park and have not been able to truly test out how well they will work for us.
We will update when we have a good idea of how they will work for us.
What products we used?
*Note- The links that we use in this post are affiliate links. If you use one of our links to purchase a product, we may receive money compensation. It does not cost you any extra and it helps us to keep this page going.
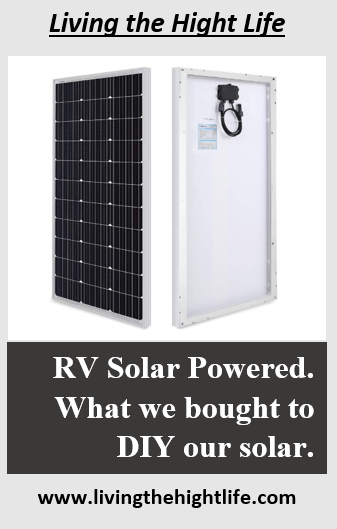
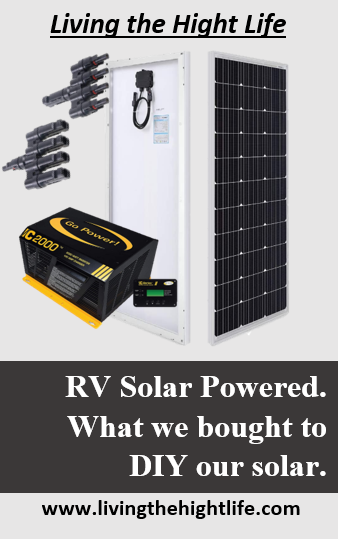
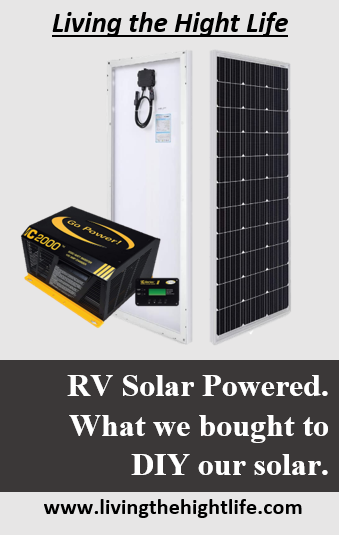
Solar Panels
98.99 X4 Solar panels- 100 WATTS. WE HAVE 4
17.39 X2 Solar Panel Mounting Z brackets- 1 set mounts 2 panels. We needed 2 sets.
9.99 MC4 Male/Female Solar panel cable connectors- 1 set of 5 (The one we purchased is no longer available)
161. 91 Solar Charge Controller- It decreases the current to a safe level for batteries (The one we purchased is no longer available)
27.98 X2 Surface-Mount Circuit Breakers- 40 amps- You need 2- One for charge controller, one for battery side.
19.95 Hammer Lug Crimper Tool
13.59 Solar Crimping Tool
8.94 Wire Lugs 8 AWG ¼”- Pack of 10- We had some extra, we used 6 of these.
52.99 8 AWG 8 Gauge wire 30 ft Black + 30 ft Red - Depends on the length you need.
10.80 Dicor, Self-Leveling
22.99 MC4 Solar Panel Connectors
2.97X 2 Shrink wrap tubing pack, multipack (includes 76 mm long, 1- 16mm tube, 2- 8mm tubes, & 2- 4mm tubes)(we didn’t need the small ones) - purchased from Walmart. Need two packs for the 16 mm tubes. 1 used for the inverter and 1 for the wire running to battery. Two of the 8 mm tubes used for solar.
Total = 803.79
Plus, electrical tape (black and red. Use red to color code your hot wire going to the inverter), 1- 2 cans of spray foam, 1-inch rubber wire looms, and assorted screws for mounting.
Inverter
1,362.94 Pure-Sine Wave Inverter Charger- We chose this one because it has safety features, including surge protection and limiting amp draw. Also, not all inverter/chargers do 50 amps, but this one does!
116.44 Romex 6/3 50 ft
14.76 WindyNation ANL Fuse Holder + ANL Fuse
58.93 2/0 Gauge 7.5 ft Black + 7.5 ft Red Wire
25.00 60-amp breaker box from Lowes
Heat Shrink tubing- Used the 16 mm tube out of the multipack
Total = 1,578.07
Grand Total 2,381.86
*Note* Prices may have changed since the time we purchased our supplies. Please verify all prices using the links provided for you.
How we figured out what we needed.
Solar panels- We chose to start at 450 watts (our RV came preinstalled with a 50-watt panel, this 50 watt is not included in any of our materials or set up instructions). With the idea that we could add additional panels as needed.
Charge controller- You choose the size of your charge controller based off of the wattage of solar panels you have. You want to oversize your charge controller for solar wattage. Each 100-watt panel produces on average 6 amps. We have 4 100-watt panels that runs off this charge controller, totaling 24 amps. Renogy recommends using a sizing safety factor of 1.56 amps. Multiple the total amps from your solar panels by the safety factor. Ours equals a total of 37.44 amps, this is why we chose a 40-amp charge controller.
Our charge controller came with an instruction manual that gave us equations and charts to figure out fuse size, wire size, and breaker size we would need. These may change depending on the charge controller you use.
Inverter- We have a Pure Sine Wave Inverter/Charger from Go Power. To determine the size of the inverter you want, look at the item you want to power that draws the most amount of wattage. Choose an inverter that is bigger than that amount.
However, inverters are electrical, they also draw power from your batteries. The bigger the inverter, the more power it will consume. You have to factor this in when choosing an inverter and sizing your battery banks.
We chose the inverter we did because it is multifunctional. The charger addition to the inverter allows your battery banks to charge twice as fast. The charging portion is vital when powering multiple electronic devices. When you are having a break from these devices, you want your batteries to charge up as fast as possible for when you want to use your electrical devices again.
The inverter you choose will have an informational booklet similar to what the charge controller had. This booklet will give you sizing on wires, fuses, and breakers needed. Make sure to consult your booklet as it may change from what we used.
How did Kenneth install it?
First lay out where you want your solar panels to be located. Some solar panels are able to tilt up and down, ours don’t. If you have solar panels like this, and you are stationary, consider the location of the sun for the hottest part of the day. You will want your solar panels facing the sun as much as possible. Also, when looking at placement of your solar panels, look at where you want to run your wires through the ceiling.
You can not undo this once it is done, so choose carefully, and take your time planning out how you want your solar.
We have chosen to withhold the electrical installation steps and instead recommend you do your own research, consult the instruction manuals, and work with an electrician. Anytime you install electrical equipment there is risk to your life and your property, and we would feel extremely guilty if one of you hurt yourself following our instructions.